Mastering Cake Decorating: Your Step-by-Step Timeline
Mastering the art of cake decorating involves not only skill and creativity but also understanding the timeline that ensures your masterpiece is ready when needed. Here's a comprehensive guide to help you navigate the process, from initial planning to the final, awe-inspiring reveal.
Planning is the first step in any successful cake decorating endeavor. This phase involves more than just choosing a recipe and gathering ingredients. It's about envisioning the final product, considering the occasion, and selecting decorating techniques that will bring your ideas to life.
Understanding the Decorating Timeline
The decorating timeline is as much about timing as it is about technique. It's a series of stages that allow you to create intricate designs without being overwhelmed or rushed.


From start to finish, the cake decorating process can take anywhere from a few hours to a few days, depending on the complexity of your design. Understanding this timeline can help you break down the project into manageable tasks and ensure that your cake is ready to impress.
Preparation: Planning and Gathering Supplies
The first stage of the timeline involves planning and preparation. This is when you decide on your design, gather your supplies, and ensure you have all the ingredients and tools you'll need. It's also a good time to check your timeline and make sure you've allocated enough time for each stage of the decorating process.


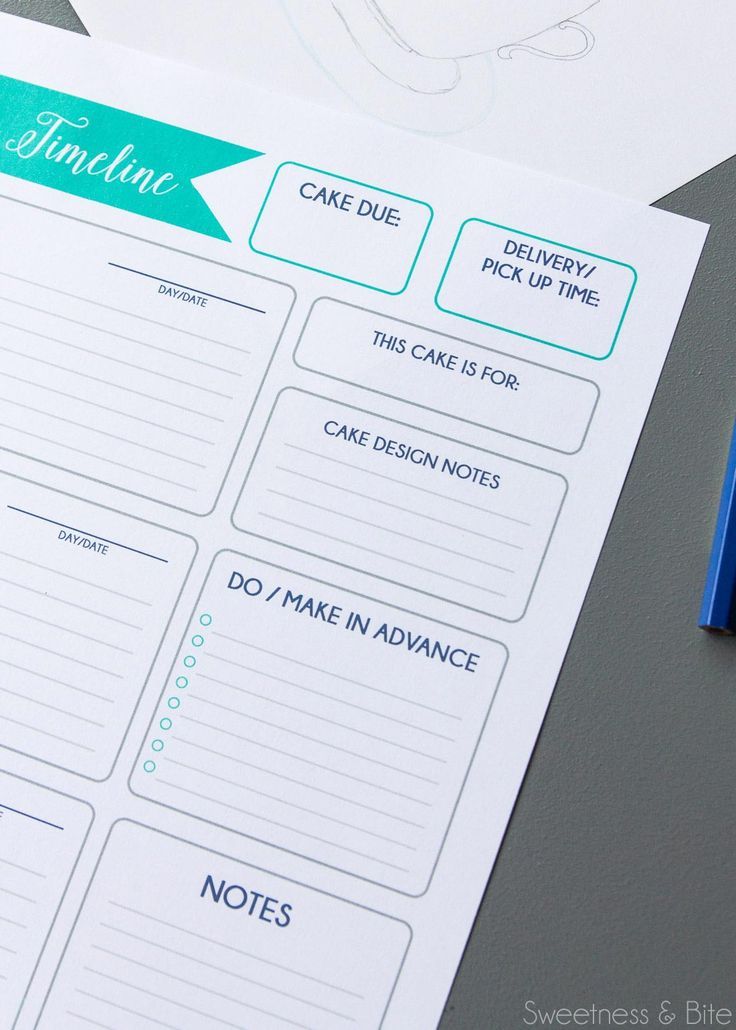
For instance, if you're planning a multi-tiered cake, you'll need to ensure you have enough time for each tier to bake, cool, and set. Similarly, if you're planning intricate piping details, you'll need to factor in the time it takes for the frosting to set between layers.
Baking and Cooling
Once you've finalized your design and assembled your supplies, it's time to bake your cakes. This stage can take anywhere from 30 minutes to a few hours, depending on the size and number of cakes you're baking.
After baking, it's crucial to allow your cakes to cool completely before decorating. This can take anywhere from 2 to 4 hours, or even overnight. Rushing this step can lead to cracked frosting and uneven decorating.


Structuring Your Cake
With your cakes cooled and levelled, it's time to start building the structure of your cake. This could involve stacking tiers, carving shapes, or creating a ganache or buttercream crumb coat.
The time taken for this stage can vary greatly depending on the complexity of your design. For a simple stacked cake, this step might take just minutes. For a carved cake or a tiered cake with intricate separations, it could take hours or even days.
Crumb Coating
Regardless of your design, chances are you'll need to apply a crumb coat. This is a thin layer of frosting that seals the cake and provides a smooth surface for the final layer of frosting. The crumb coat also helps to prevent crumbs from mixing with your final layer of frosting.
Applying a crumb coat can take anywhere from 15 to 30 minutes, depending on the size and complexity of your cake. After applying the crumb coat, you'll need to allow the frosting to set before proceeding with the next stage. This can take anywhere from 15 minutes to a few hours, depending on the temperature and humidity of your environment.
Applying the Final Layer of Frosting
Once the crumb coat has set, it's time to apply the final layer of frosting. This is where you'll create the smooth, flawless finish that will serve as the canvas for your decorations.
The time taken for this stage can vary greatly depending on the type of frosting you're using and the size and shape of your cake. As a general rule, you should allow at least 30 minutes for the frosting to set before proceed to the next stage.
Adding the Final Touches
With the base of your cake complete, it's time to add the final touches that will make your creation truly unique. This could involve piping patterns, adding edible decorations, or creating intricate sugar art.
The time taken for this stage can vary greatly depending on the complexity of your design. For a simple piped pattern, this step might take just minutes. For an elaborate sugar art display, it could take hours or even days.
Letting Your Cake Rest
After adding the final touches, it's crucial to allow your cake to rest before serving. This gives the frosting a chance to set completely and ensures that your decorations are secure.
The exact time you'll need to allow for this stage can vary, but as a general rule, you should try to rest your cake for at least a few hours before serving. If possible, it's even better to refrigerate your cake overnight to allow the flavors to meld together.
Serving Your Cake
The final stage of the cake decorating timeline is serving your cake. This is the moment when all your hard work pays off and you get to share your masterpiece with your guests.
When serving your cake, it's important to remember that temperature and humidity can both affect the stability of your frosting and decorations. Therefore, it's a good idea to keep your cake refrigerated until the last possible moment and to serve it as quickly as possible after removing it from the refrigerator.
Stringing together these key steps in the cake decorating timeline allows you to turn a simple baked good into an extraordinary, incredibly detailed centerpiece. With practice and patience, you can master these techniques, often pushing the boundaries of what's possible in cake decorating. Who knows, maybe you'll be the next sensation in the ever-growing world of cake decorating. So, embrace the journey, experiment, and watch your creativity flourish. Happy decorating!"
Related Articles

Mastering Monster Cakes: Step-by-Step Tutorial
If you're looking to create a showstopper of a cake that's sure to impress, you've come to the right place. Today, we're diving into the delightful world of...

Mastering Icing: The Best Cake Decorating Recipes of 2023
Cake decorating is an art form that transforms simple confections into magnificent masterpieces. Whether you're a seasoned baker or just starting out...
Mastering Cake Decorating: Expert Techniques in PDF
Embellishing cakes has evolved into an art form, with countless techniques now at the disposal of cake decorators worldwide. These techniques, when mastered...
Piping Nozzles & Patterns: Mastering Cake Decorating
Cake decorating is an art form that requires skill, patience, and the right tools. One of the most essential tools for cake decorators is the piping nozzle...
Mastering Cake Decorating: Top Tips and Fresh Ideas
Mmm, the sweet scent of freshly baked cakes wafts through the air, beckoning us to explore the art of decorating these delightful concoctions. With a bit of...
Mastering Cake Decorating: Top Tips for Impressive Results
Cake decorating, an art form that brings joy and delight to every celebration, involves a myriad of skills and techniques. Mastering these can elevate your...