Tissue Paper Crafts: Step-by-Step Tutorials
Tissue paper crafts are a fun, eco-friendly, and budget-friendly way to create beautiful art and decorative pieces. Using tissue paper is an excellent way to recycle and repurpose materials, making these crafts perfect for upcycling, school projects, or just for fun. Here, we'll guide you through some fascinating tissue paper crafts, step by step.
Tissue paper crafts have been around for centuries, with origins tracing back to Japan's artisans who mastered the art of washi paper making. Today, tissue paper crafts have evolved into a diverse range of art forms, from suncatchers to tassels and even wall art. Let's delve into the creative world of tissue paper crafts and discover how you can create stunning pieces at home.
Tissue Paper Suncatchers
Tissue paper suncatchers are a vibrant and enchanting way to let natural light brighten your space. They are perfect for windows, hanging from chandeliers, or even gracing the sides of glass lanterns.

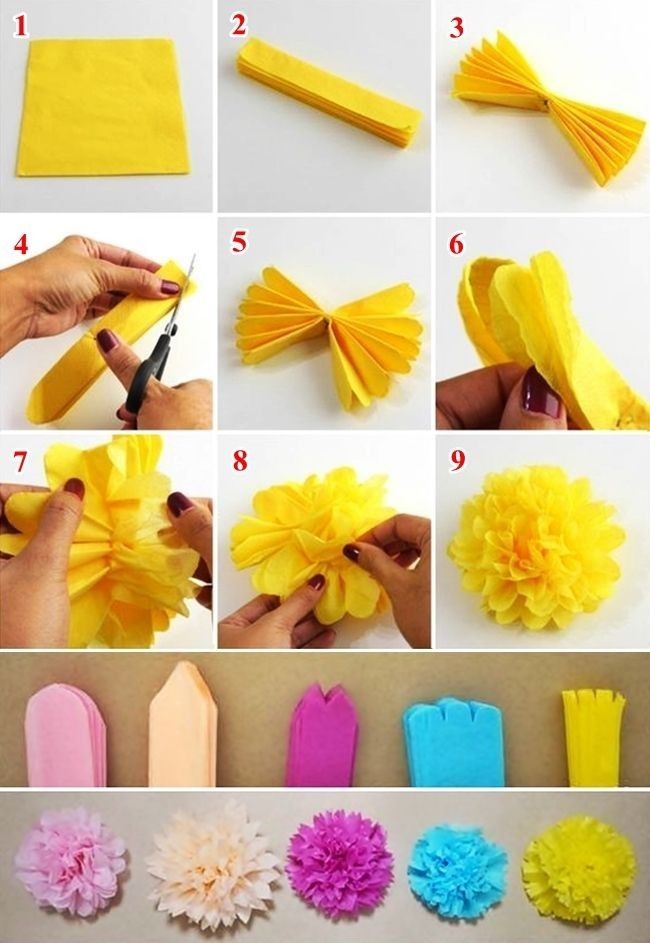

To create these mesmerizing suncatchers, you'll need translucent tissue paper, contact paper, a pair of scissors, a paintbrush, and Mod Podge (or a mix of water and school glue).
Tissue Paper Cutouts
Begin by cutting your tissue paper into various shapes and sizes. You can use cookie cutters, stencils, or freehand designs. Encourage kids to create abstract patterns, geometric shapes, or their favorite animals and characters.


For each cutout, carefully lay it down on a sheet of contact paper, sticky side up. Follow the edges of your cuts, pressing firmly to adhere the tissue paper to the contact paper. Once complete, peel off the backing and set it aside.
Layering and Seal
After creating your initial cutouts, layer them on a flat surface, varying the colors and shapes for a striking visual effect. Once satisfied with your arrangement, carefully apply a thin layer of Mod Podge onto a paintbrush, brushing it evenly over the entire surface. Work quickly, as the Mod Podge dries thin and fast.
Gently smooth out any air bubbles, ensuring your layers are secure. Let it dry for a few hours, then hang your masterpiece where it can catch the sunlight and dance with its colors.


Tissue Paper Tassels
Tissue paper tassels are playful and colorful additions to your home decor, party favors, or even gift tag accents. Their delicate, frilly texture adds a touch of whimsy to any space.
For these tassels, you'll need 20cm x 20cm tissue paper squares (or double up smaller sheets), scissors, and a hole punch.
Folding and Cutting
Start by laying your tissue paper flat and folding it in half diagonally to form a triangle. Fold it again in half towards the tip, creasing the center point. Open it back up, and your tissue paper should now have a central crease with two smaller creases on either side.

Cut along the edges of the triangle closest to the tip, stopping before the central crease. Discard the tiny triangle of excess tissue.
Stringing the Tassels
Using the hole punch, make two punches near the folded tip of your tissue paper. Insert a piece of string, yarn, or ribbon through the holes and tie a knot at the base to secure it. Gently pull on the string to separate the cut edges and fluff out your tassel.
Trim the edges if needed, and adjust the string length for hanging or tying. Repeat with different tissue paper colors and patterns for an array of charming tassels to string together or scatter throughout your space.
Tissue Paper Wall Art
Transform your walls into dazzling works of art with a stunning tissue paper feature wall. This technique adds depth and vibrancy to any room, making it perfect for accentuating specific areas like headboards, entryways, or behind kitchen counters.
You'll need a large sheet of lightweight cardstock or foam board, paint, paintbrushes,Mod Podge or a wall-safe glue, scissors, and your chosen tissue paper.
Painting the Base
Begin by painting your cardstock or foam board with your chosen wall color. Let it dry completely, as this will act as the base for your tissue paper art.
Once dry, apply a layer of Mod Podge or a wall-safe glue to the entire surface, working in sections to keep it wet. Gently lay your tissue paper on top, pressing it firmly and smoothing out any creases. Trim the excess tissue paper along the edges.
Decorative Fringe
For added texture, frame your tissue paper art with decorative fringe made from tissue paper strips. Cut tissue paper into 5-7cm wide strips, then fold them in half lengthwise. Glue the open edge to the back of your painted surface, leaving the folded edge free to hang.
Once completed, apply another layer of Mod Podge or wall-safe glue over the entire surface to seal, ensuring your artwork remains vibrant and protected for years to come.
Now that you've explored these mesmerizing tissue paper crafts, it's time to unleash your creativity and give them a try. Remember, the most extraordinary art often comes from experimenting and having fun. So grab your tissue paper and dive into a world of vibrant hues and delicate textures. Who knows what stunning masterpieces you'll create?
Related Articles

Easy Paper Tulip Tutorial: Step-by-Step
Harness the joy of origami with our step-by-step guide to creating beautiful paper tulips. No need for a green thumb, just some paper and a few minutes of your...

Paper Mache Animals: Step-by-Step Guide
Step into the whimsical world of paper mache, where simple sheets transform into delightful, three-dimensional animals. This age-old craft is a cost-effective...

Master Snowflake Paper Craft: Step-by-Step Guide
The art of paper craft has long captivated both children and adults alike, offering a creative and engaging way to transform simple sheets of paper into...

"Free Paper Model Building Templates: Step-by-Step Instructions for Crafts & DIY Enthusiasts"
In the realm of crafting and collectibles, paper model building has emerged as a creative and rewarding pastime. With a simple yet powerful tool, a paper model...

Paper Star Tutorial: Step-by-Step Guide
Transform simple paper into a twinkling star with our step-by-step tutorial. This festive craft is perfect for winter holidays, birthday decorations, or just...

Paper Folding for Beginners: Step-by-Step Guide
The art of paper folding, also known as origami, is an incredibly creative and relaxing hobby that has been enjoyed for centuries. Whether you're a seasoned...